
Table of contents
- How to create or edit a blog post?
- How to deploy my edits to the website?
- How to add images or videos to the posts?
- How to add links and citations?
- How to add people to the lab?
- How to edit and preview the content in Linux?
How to create or edit a blog post?
Creating/editing pages can be done directly on the GitHub webpage if you are not familiar with command line tools. If you are familiar with Linux command line, you may follow these steps instead.
-
You need to have a GitHub account.
-
Navigate to the website repository and click
forkon the top right corner.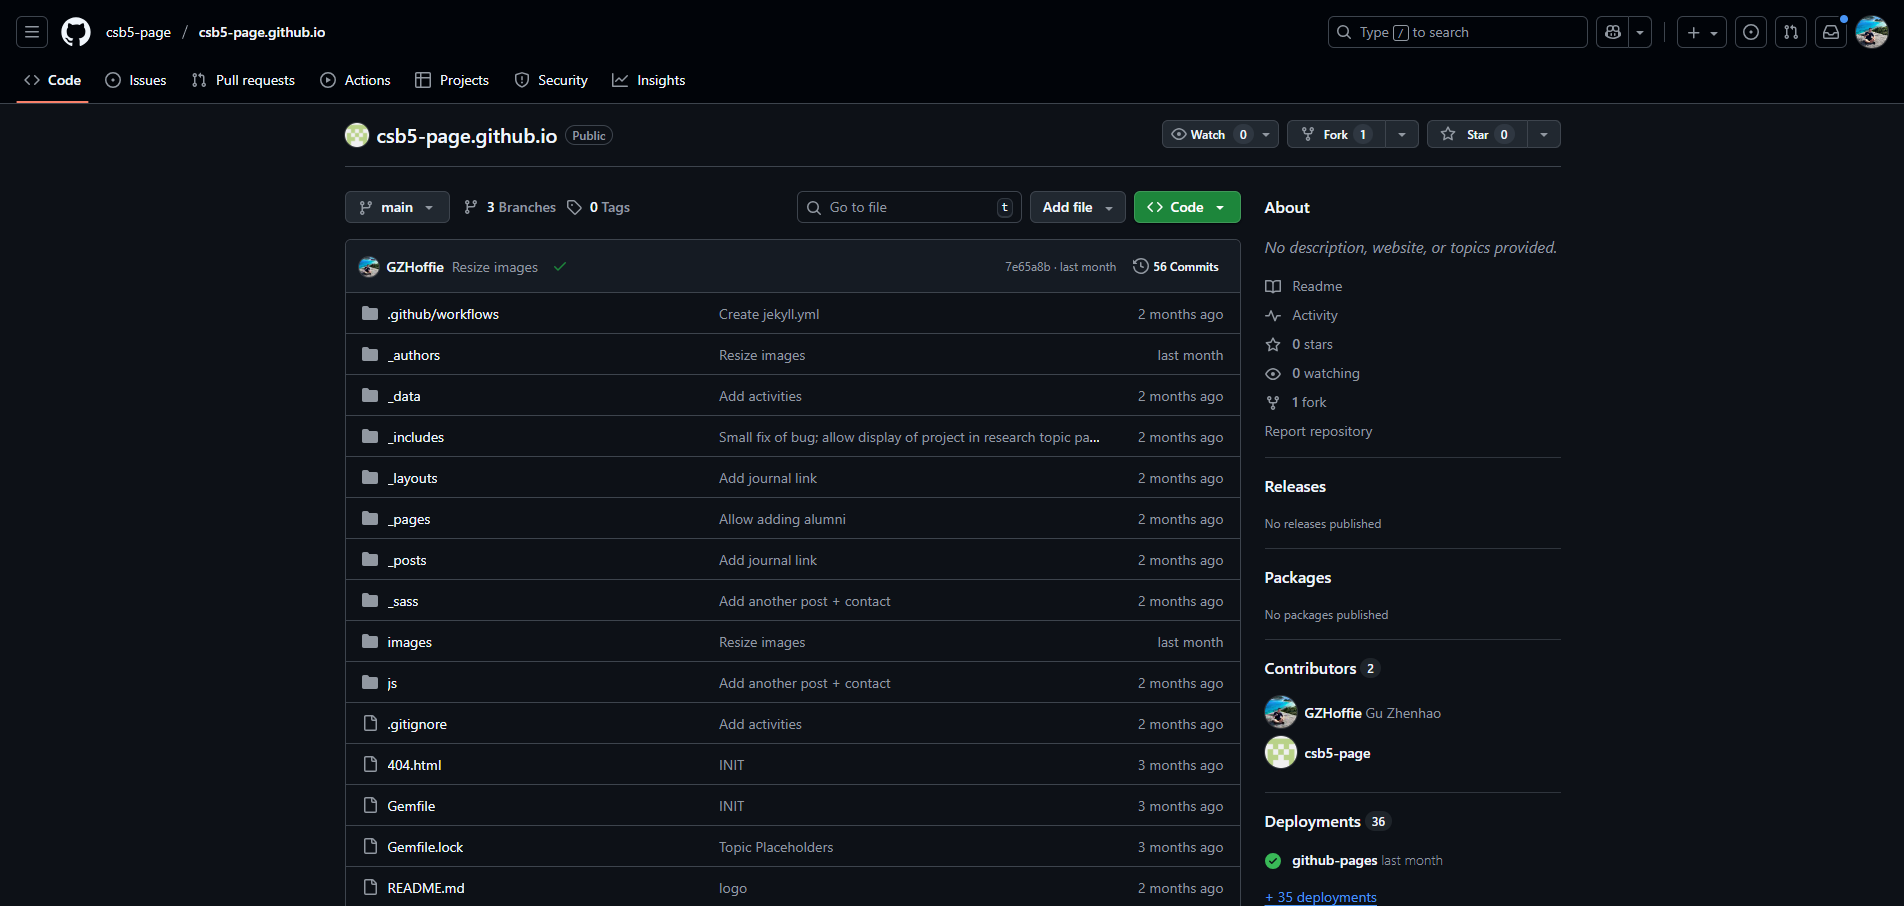 On the top right there are 3 buttons. Click “fork” to create a copy.
The fork only needs to be done once, and you may use your forked repository for future commits.
-
Navigate to your forked repository. You can find it in your list of repositories (click your profile picture on the top right, and select
Repositories).Before you commit, check if the message
This branch is up to date with CSB5/csb5.github.io:main.appears at the top of your page. If your branch is behind the main branch, click theSync forkbutton. -
Go to the
_postsfolder, clickAdd fileon the top right to create a new post or an existing file to edit one.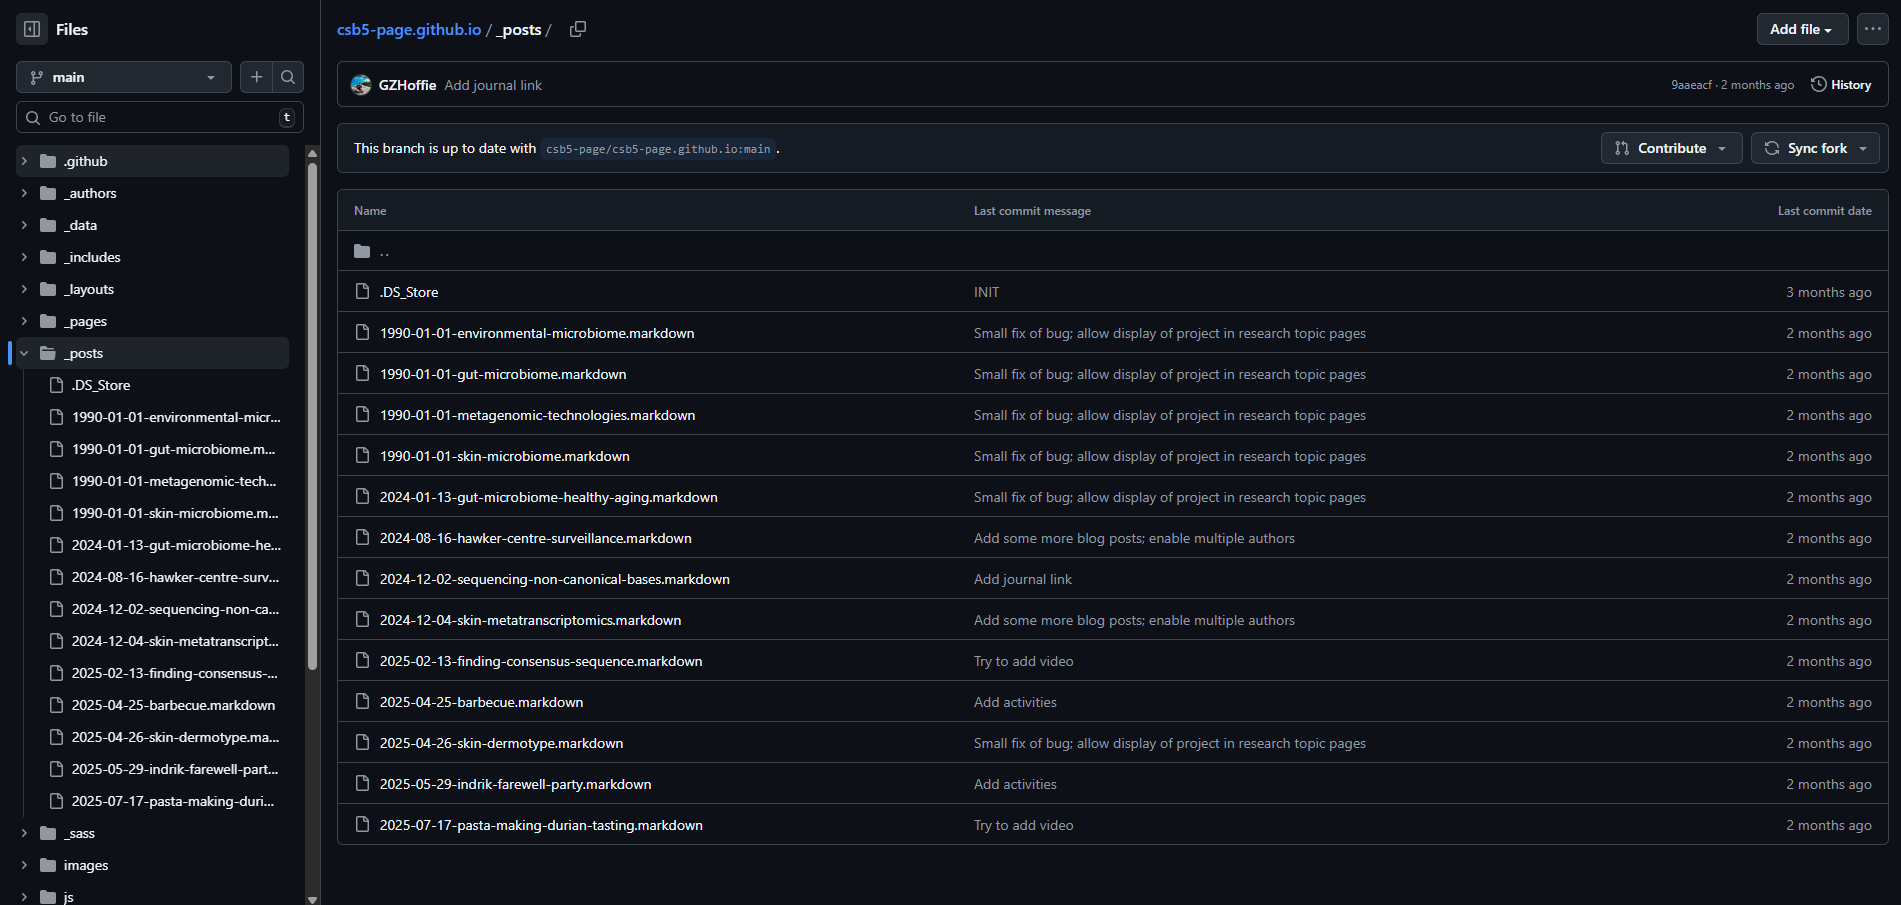 You should see something like this.
If you are adding a new file, make sure its name is in the form of
YYYY-MM-DD-your-post-title.markdown. -
Every markdown should start with a metadata section. See this file for an example. It contains the following fields. The order of the fields doesn’t matter.
---
layout: post
title: [preferably short project title]
description: [short one- or two-sentence summary of the project]
image: [a pretty image that is going to be the thumbnail of your post]
image_caption: (optional) [caption (or source) of the thumbnail image]
date: (optional) [date of the publication or start of the project in the form of YYYY-MM-DD]
tags: (optional) [list of topics]
preprint: (optional) [link to the published preprint]
paper: (optional) [link to the published paper]
publication: (optional, must define the paper field) [Name of the conference/journal]
code: (optional) [link to the code repository]
author: [one or a list of authors]
featured: false
---
The list of authors should take the form
[mauricio, nok, rafael, niranjan], where each entry is theusernamedefined in the author page. -
Add the content of the post below the metadata. Refer to this guideline for adding images.
-
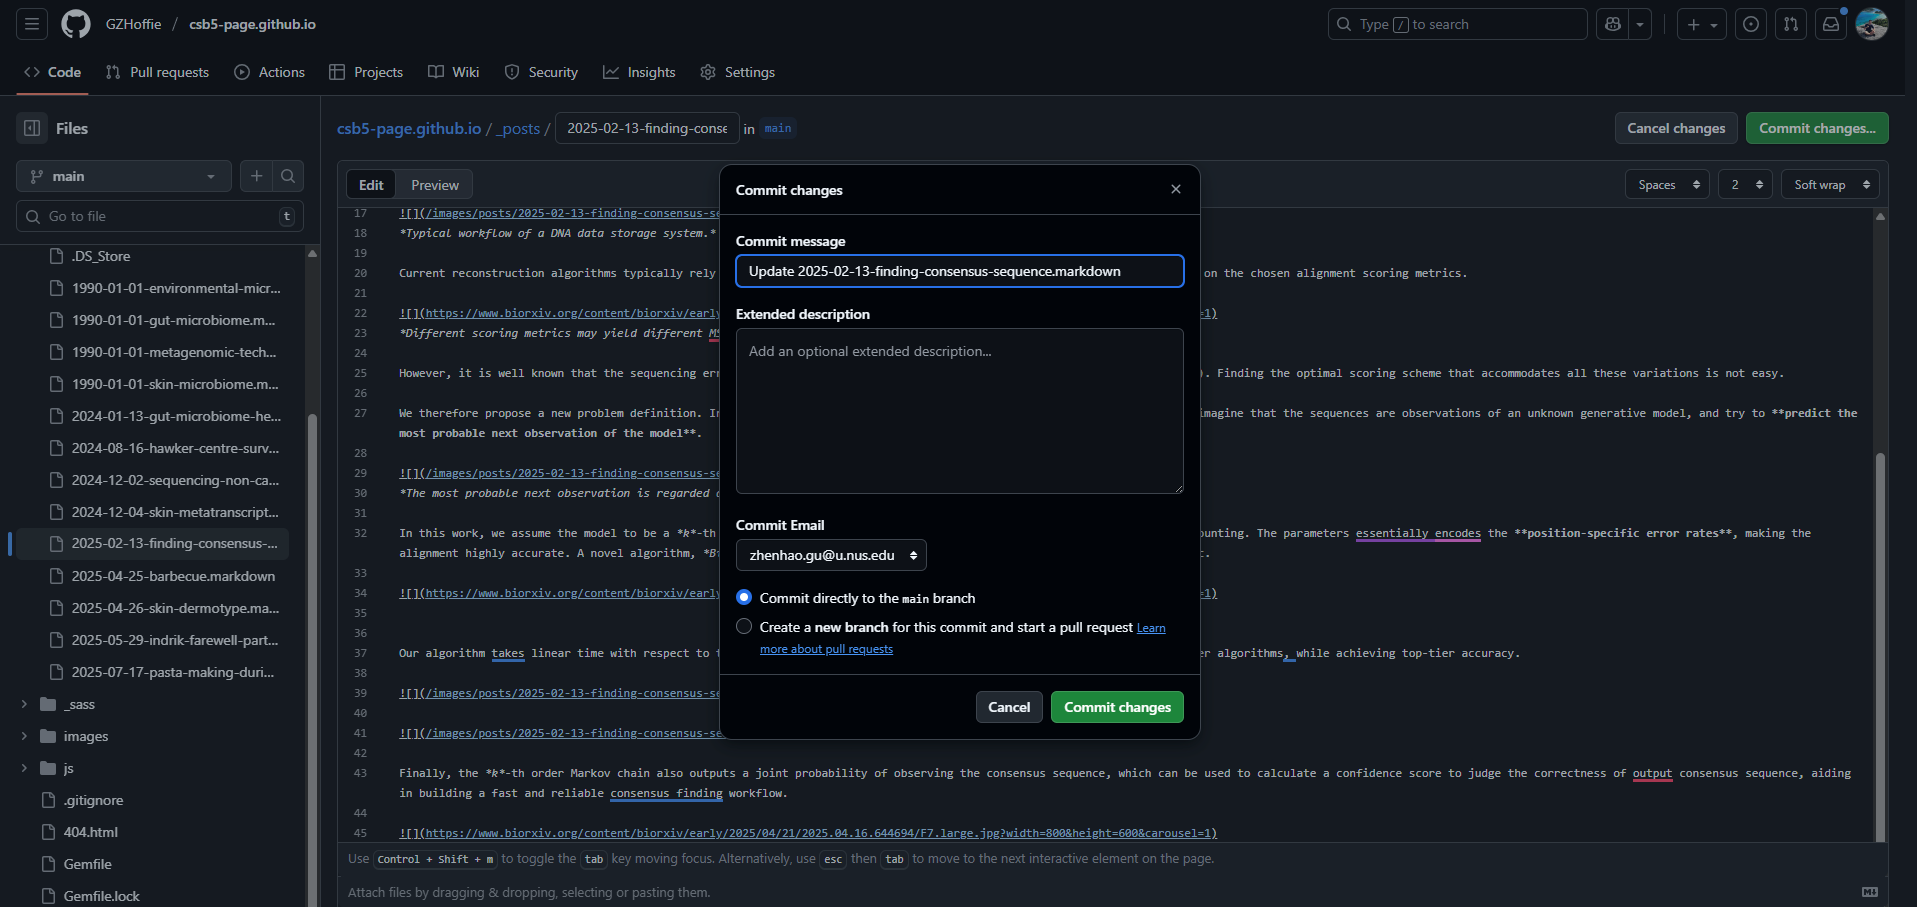
Commit your changes to the website with these steps.
How to deploy my edits to the website?
-
After you finished editing, commit your changes (the green button on top right).
-
Once you’ve done all the commits, navigate again to the main page of your fored repository. You may notice a message that says
This branch is x commit ahead of CSB5/csb5.github.io:main. Click onContributeand open a pull request (PR)! -
You may see your PR in the
Pull requesttab of the main website repository. A build test will run automatically to check whether your we can build the website successfully with your edits. If the build test succeeds (ignore the deployment test), you are good to go!
 -
Ask one of the website maintainer (or become one!) to merge your PR, and soon your edits will appear on the website!
How to add images or videos to the posts?
You can either add images from other websites by copying the image links (not recommended, as the image links will become invalid if the website that contains it gets deleted or edited), or adding the image directly to the repository.
Under images/posts/, create a separate folder with the same name as the blog post markdown file, and store all images & videos used in the blog post there.
Find out how to use different styles for fonts, images, and videos in your blog posts in this demo and its source code.
How to add links and citations?
In the markdown file, you can include hyperlinks using the format [Text](Link),
Example:
[Preprint](https://www.biorxiv.org/content/10.1101/2025.04.24.650393v1)
Demo: Preprint
You can also include links that let you jump to another position in the page. The link would look like [Text](#target_id), and the position you would jump to should be labeled with <a id="target_id"></a>. Example:
Here is our preprint [[1](#preprint)].

### References

<a id="preprint">[1]</a> Li, C., Ravikrishnan, A., Wijaya, I., Naim, A. N. M., Gounot, J. S., Wearne, S., ... & Nagarajan, N. (2025). Large-scale skin metagenomics reveals extensive prevalence, coordination, and functional adaptation of skin microbiome dermotypes across body sites. bioRxiv, 2025-04.
Demo: Here is our preprint [1].
References
[1] Li, C., Ravikrishnan, A., Wijaya, I., Naim, A. N. M., Gounot, J. S., Wearne, S., … & Nagarajan, N. (2025). Large-scale skin metagenomics reveals extensive prevalence, coordination, and functional adaptation of skin microbiome dermotypes across body sites. bioRxiv, 2025-04.
How to add people to the lab?
-
Create a fork of the website repository using the first three steps in this guide, if you haven’t done so already.
-
Under
_authorsfolder, create a new markdown file for the person you want to add. The name of the file should be the same as the name of the person. -
Create the metadata section for the person’s info. See this file for an example. It contains the following fields. The order of the fields doesn’t matter.
--- username: [A short phrase, usually the person's first name] name: [The person's full name] nick_name: [The person's nick name] image: [Link to the person's photo] image_fun: (optional) [Link to the person's photo] email: (optional) [Email address] website: (optional) [Personal webpage] scholar: (optional) [Google scholar profile] research_gate: (optional) [Research gate profile] orcid: (optional) [ORCID profile] github: (optional) [GitHub profile] X: (optional) [X page] bluesky: (optional) [bluesky page] linkedin: (optional) [LinkedIn profile] position: [The person's position in the lab] is_alumni: (optional) [If set to true, this person will appear in the "Alumni" page] is_intern: (optional) [If set to true, this person will appear in the "Interns" page] --- -
Add the person’s qualification and (optional) self introduction below the metadata.
How to edit and preview the content in Linux?
The following steps needs a linux command line.
-
Refer to this documentation (first 2 steps) to install all the prerequisites.
-
Clone your forked repository to your computer. Navigate to the folder.
cd csb5.github.io/ -
Build the website using
bundle exec jekyll serve -
Open your favourite web browser and enter
http://localhost:4000to view the built webpage.
- After you update a file, click Ctrl+S to save the file, and refresh to see the updated webpage.
-
Use
git committo save your edits, andgit push origin mainto push your edits to your forked branch. Create a pull request in the GitHub webpage, so that your edits are deployed.